
はじめに
本記事は「LaravelでToDoアプリを開発する Part2」の続きになります。
まだPart2を見ていない方はそちらからご覧ください。
タスク詳細画面作成
次に、タスクの詳細情報を見れる画面を作成しましょう。
ルーティング作成
詳細用のルーティングを追加します。
routes/web.php
<?php

use Illuminate\\Support\\Facades\\Route;

/*
|--------------------------------------------------------------------------
| Web Routes
|--------------------------------------------------------------------------
|
| Here is where you can register web routes for your application. These
| routes are loaded by the RouteServiceProvider within a group which
| contains the "web" middleware group. Now create something great!
|
*/

Route::get('/', [App\\Http\\Controllers\\HomeController::class, 'index'])->name('task.index');
Route::post('/create', [App\\Http\\Controllers\\HomeController::class, 'store'])->name('task.create');
Route::get('/{id}', [App\\Http\\Controllers\\HomeController::class, 'show'])->name('task.show'); // 追加
パスにIDが含まれていますが、これはタスクIDのことです。
これはどのタスクの詳細画面なのか?という情報がないと詳細画面を表示できないため、タスクIDをクライアントから受け取るようにしています。
Controller作成
続いて、Controllerに詳細用のshowアクションを追加します。
app/Http/Controllers/HomeController
public function show($id) {
    $task = Task::find($id);
    return view('show', ['task' => $task]);
}
showアクションでは、引数としてクライアントから送られたタスクIDを受け取り、そのIDに合致するタスクを取得してます。
そして、該当データを最後にViewに渡しています。
このように記述することで、この後作成する詳細のViewでタスクの詳細データが表示できるようになります。
View作成
それでは最後に詳細画面のViewを作成し、一覧画面を少し修正しておきましょう。
「resources/views/show.blade.php」を作成してください。
resources/views/show.blade.php
<!DOCTYPE html>
<html lang="ja">
<head>
    <meta charset="UTF-8">
    <meta name="viewport" content="width=device-width, initial-scale=1.0">
    <meta http-equiv="X-UA-Compatible" content="ie=edge">
    <title>ToDoアプリ</title>
</head>
<body>
    <div class="container">
        <h1>タスク詳細画面</h1>
        <div class="content-wrapper">
            <div class="title-group">
                <label for="">■ タイトル</label>
                <p>{{ $task->title }}</p>
            </div>
            <div class="description-group">
                <label for="">■ 説明</label>
                <p>{{ $task->body }}</p>
            </div>
        </div>
        <a href="{{ route('task.index') }}" class="link">一覧へ</a>
    </div>
    <style>
        .container {
            width: 60%;
            display: flex;
            flex-direction: column;
            justify-content: center;
            margin: 0 auto;
        }
        .container .form-wrapper {
            display: flex;
            width: 650px;
            justify-content: center;
            margin: 0 auto;
            margin-top: 50px;
        }
        .container .form-wrapper form {
            display: flex;
            flex-direction: column;
            gap: 30px;
            width: 60%;
        }
        .container .form-wrapper form button {
            border: 1px solid black;
            border-radius: 15px;
            background-color: skyblue;
            width: 100px;
            cursor: pointer;
        }
        .container .form-wrapper form .form-group {
            display: flex;
            flex-direction: column;
        }
        .container .table-wrapper {
            display: flex;
            justify-content: center;
            margin-top: 100px;
        }
        .link {
            border: 1px solid black;
            padding: 5px 10px;
            border-radius: 15px;
            color: black;
            background-color: skyblue;
            text-decoration: none;
            width: 40px;
            font-size: 0.8em;
        }
    </style>
</body>
</html>
以下のような部分で該当タスクデータを受け取っています。
<div class="content-wrapper">
    <div class="title-group">
        <label for="">■ タイトル</label>
        <p>{{ $task->title }}</p>
    </div>
    <div class="description-group">
        <label for="">■ 説明</label>
        <p>{{ $task->body }}</p>
    </div>
</div>
この二重波括弧はマスタッシュ構文といい、サーバーから受け取ったデータを使用する際に使います。
これでタスク詳細画面ができました!
しかし、今のままでは画面上からこの詳細画面に入ることができません。
そこで、一覧画面に詳細画面へのリンクを作成し、飛べるようにしましょう。
一覧画面のタイトルを表示している部分を以下のように修正してください。
resources/views/home.blade.php
<td><a href="{{ route('task.show', ['id' => $task->id]) }}">{{ $task->title }}</a></td>
タスクのタイトルを表示している部分に詳細画面へのリンクを追加しました。
これでタイトルをクリックすると詳細画面へ飛ぶようになったはずです。
後はタスク編集・削除機能のみです。
あと一歩!
Gitにコミットしておきましょう。
$ git status
$ git diff ファイル名
$ git add ファイル名
最初に解説した通りに変更ファイルを1ファイルずつ確認して行ってください。
すべて問題がなければコミットします。
$ git commit -m "タスク詳細画面作成"
タスク編集画面作成
さて、それではタスク編集機能の実装に入りましょう。
ルーティング作成
まずはルーティングを一本追加しておきます。
app/routes/web.php
<?php

use Illuminate\\Support\\Facades\\Route;

/*
|--------------------------------------------------------------------------
| Web Routes
|--------------------------------------------------------------------------
|
| Here is where you can register web routes for your application. These
| routes are loaded by the RouteServiceProvider within a group which
| contains the "web" middleware group. Now create something great!
|
*/

Route::get('/', [App\\Http\\Controllers\\HomeController::class, 'index'])->name('task.index');
Route::post('/create', [App\\Http\\Controllers\\HomeController::class, 'store'])->name('task.create');
Route::get('/{id}', [App\\Http\\Controllers\\HomeController::class, 'show'])->name('task.show');
Route::get('/edit/{id}', [App\\Http\\Controllers\\HomeController::class, 'edit'])->name('task.edit');  // 追加
これで「/edit/{id}」にアクセスした時にHomeControllerのeditアクションに接続されるようになりました。
また、どのタスクの編集を行うのか指定する必要があるので、「/edit/{id}」でクライアントからタスクIDを受け取っています。
Controller作成
次にControllerにeditアクションを追加します。
app/Http/Controllers/HomeController.php
public function edit($id) {
    $task = Task::find($id);
    return view('edit', ['task' => $task]);
}
これは一行目で該当タスクを絞り込み、二行目で該当タスクのデータを編集画面のViewファイルに渡しています。
これはなぜ必要かというと、編集画面を開いた際の初期表示時にデフォルトで該当タスクのタスク名や説明を入れるためです。
次に、Viewファイルを作成していきます。
「resources/views/edit.blade.php」を作成します。
resources/views/edit.blade.php
<!DOCTYPE html>
<html lang="ja">
<head>
    <meta charset="UTF-8">
    <meta name="viewport" content="width=device-width, initial-scale=1.0">
    <meta http-equiv="X-UA-Compatible" content="ie=edge">
    <title>ToDoアプリ</title>
</head>
<body>
    <div class="container">
        <h1>タスク編集画面</h1>
        <div class="form-wrapper">
            <form action="{{ route('task.update', $task->id) }}" method="POST">
                @csrf
                <div class="form-group">
                    <label for="">タイトル</label>
                    <input type="text" name="title" value="{{ $task->title }}" />
                </div>
                <div class="form-group">
                    <label for="">説明</label>
                    <textarea name="body" id="body" cols="30" rows="10">{{ $task->body }}</textarea>
                </div>
                <button type="submit" class="submit">更新</button>
            </form>
        </div>
    </div>
    <style>
        .container {
            width: 60%;
            display: flex;
            flex-direction: column;
            justify-content: center;
            margin: 0 auto;
        }
        .container .form-wrapper {
            display: flex;
            width: 650px;
            justify-content: center;
            margin: 0 auto;
            margin-top: 50px;
        }
        .container .form-wrapper form {
            display: flex;
            flex-direction: column;
            gap: 30px;
            width: 60%;
        }
        .container .form-wrapper form button {
            border: 1px solid black;
            border-radius: 15px;
            background-color: skyblue;
            width: 100px;
            cursor: pointer;
        }
        .container .form-wrapper form .form-group {
            display: flex;
            flex-direction: column;
        }
        .container .table-wrapper {
            display: flex;
            justify-content: center;
            margin-top: 100px;
        }
        .edit {
            border: 1px solid black;
            padding: 5px 10px;
            border-radius: 10%;
            color: black;
            background-color: skyblue;
            text-decoration: none;
        }
        .delete {
            border: 1px solid black;
            padding: 5px 10px;
            border-radius: 10%;
            color: black;
            background-color: red;
            text-decoration: none;
        }
    </style>
</body>
</html>
一覧画面から編集画面に飛べるようにリンクを追加しておきましょう。
タスク一覧画面の以下の部分を修正します。
resources/views/home.blade.php
<td>
    <a href="/edit/{{ $task->id }}" class="edit">編集</a>
</td>
これで一覧画面から編集ボタンをクリックした際に該当タスクの編集画面に飛ぶようになったはずです。
以下のような画面になったら成功です。
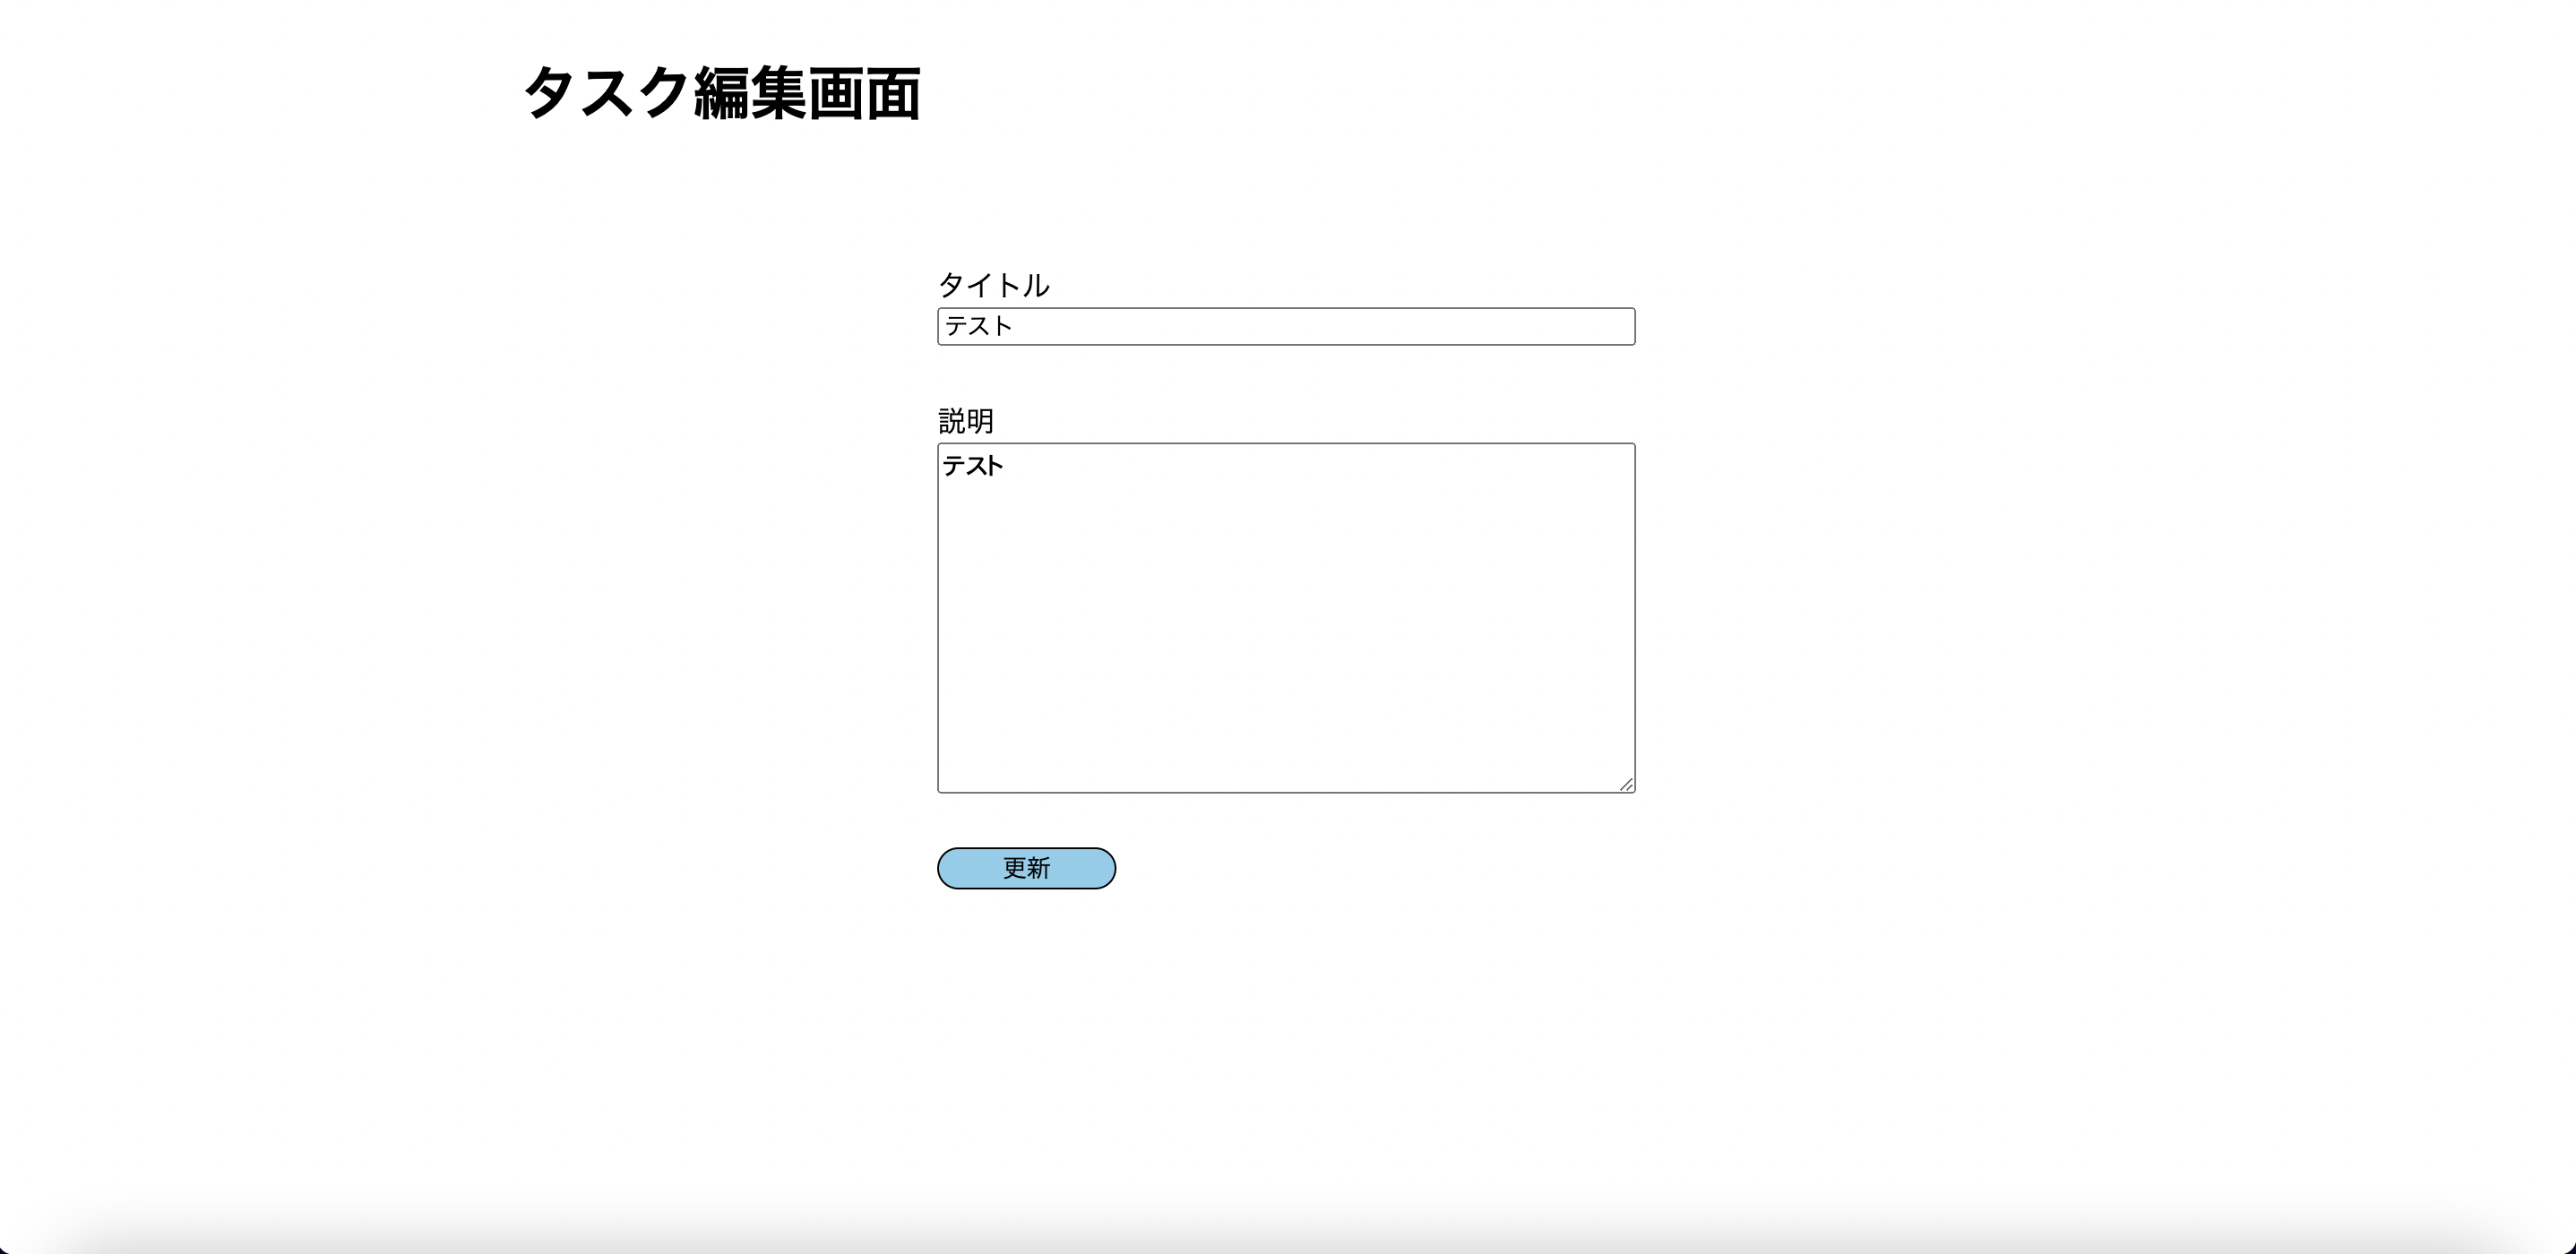
これで編集画面は作成できました。
Gitにコミットしておきましょう。
$ git status
$ git diff ファイル名
$ git add ファイル名
最初に解説した通りに変更ファイルを1ファイルずつ確認して行ってください。
すべて問題がなければコミットします。
$ git commit -m "タスク編集画面作成"
ここまで、お疲れ様でした!🥳
次は、タスク更新とタスク削除機能について解説していきます。


コメント